зеркало из
https://github.com/ssciwr/AMMICO.git
synced 2025-10-29 13:06:04 +02:00
* fixing DemoNotebook

* fixing DemoNotebook2

* rearrange the code and text

* continiue changing demo notebook

* continiue changing demo notebook2

* fixing bug on a100 in google colab

* change order of tests and do not test for age in faces

* add screenshots for gcv api

* instructions for google cloud vision API

* link instructions in readme

* add missing image

* trim whitespace

---------

Co-authored-by: Inga Ulusoy <inga.ulusoy@uni-heidelberg.de>
2.2 KiB
2.2 KiB
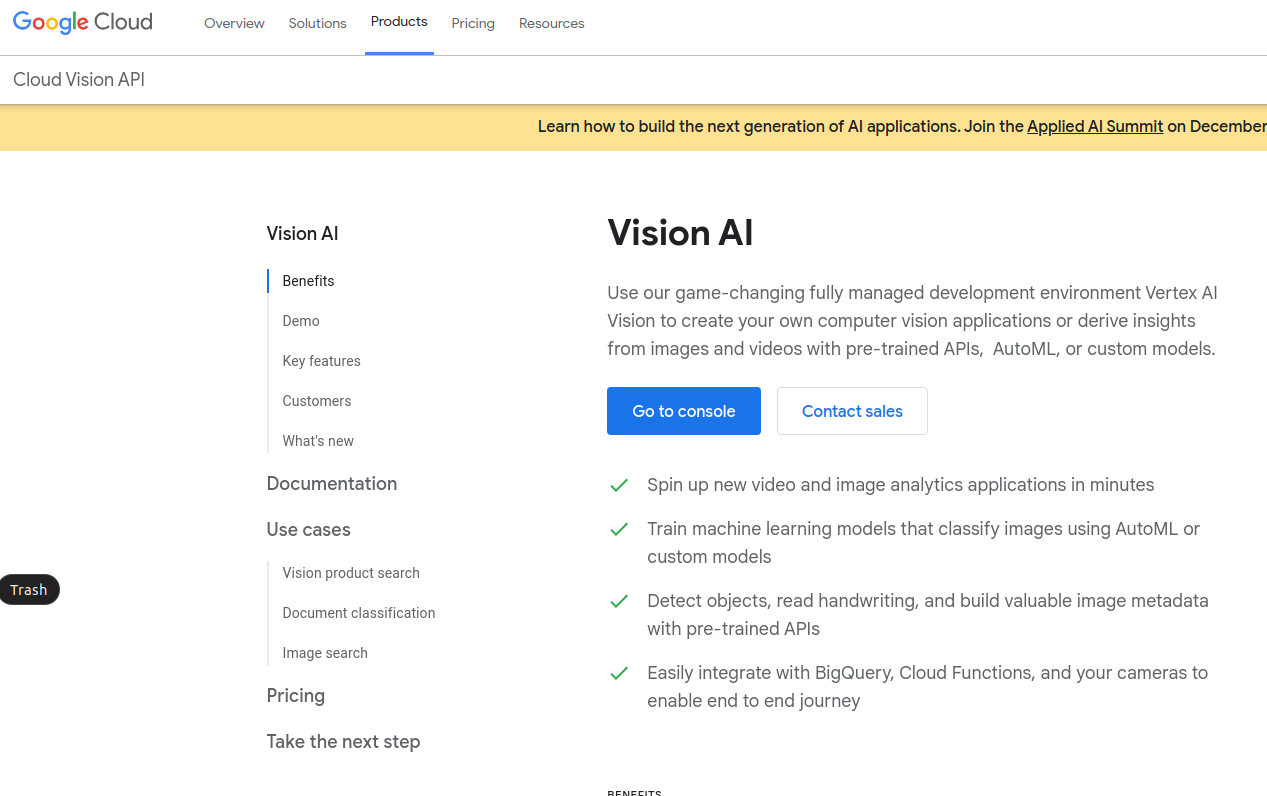
Instructions how to generate and enable a google Cloud Vision API key
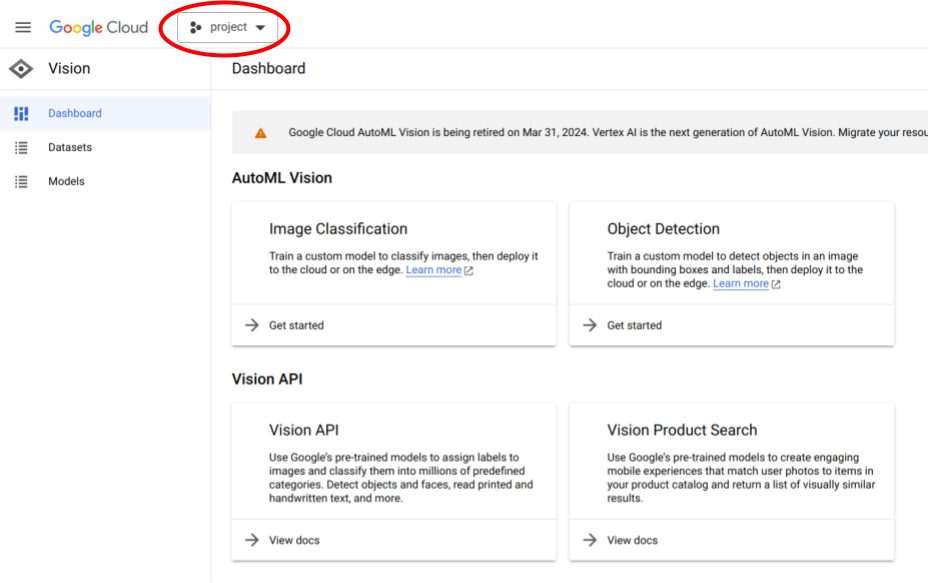
- Go to google-cloud-vision and click on "Console". Sign into your google account / create a new google account if prompted. This will bring you to the following page, where you click on "project" in the top of the screen.
- Select "project" from the top left drop-down menu.
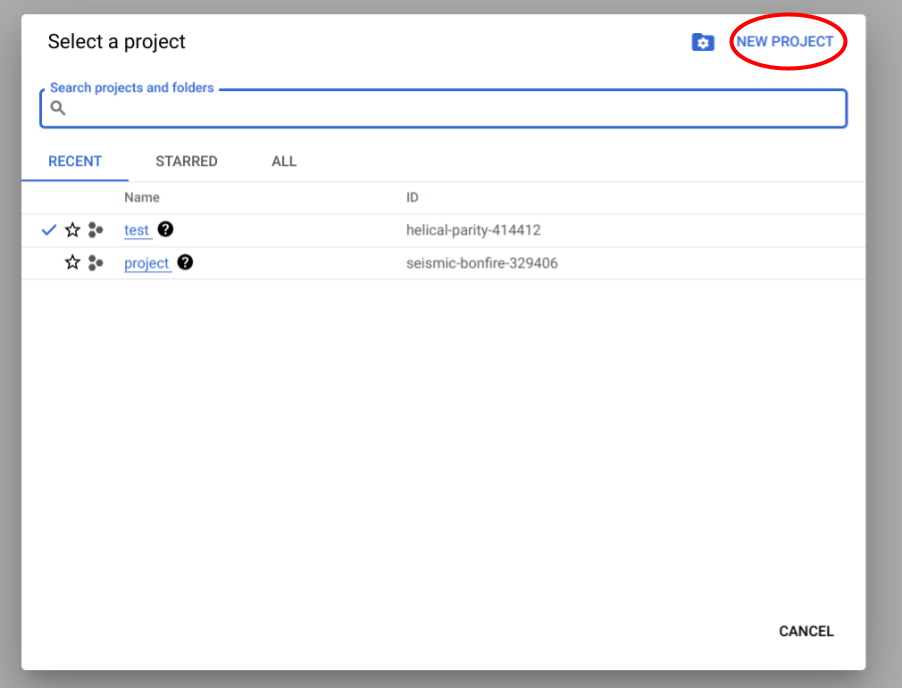
- Click on "NEW PROJECT" on the left of the pop-up window.
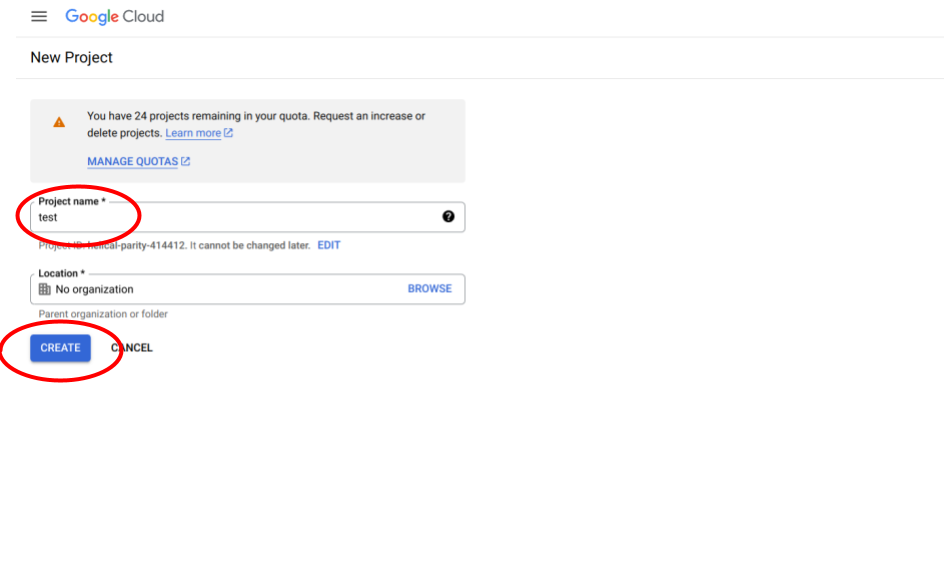
- Enter a project name and click on "CREATE".
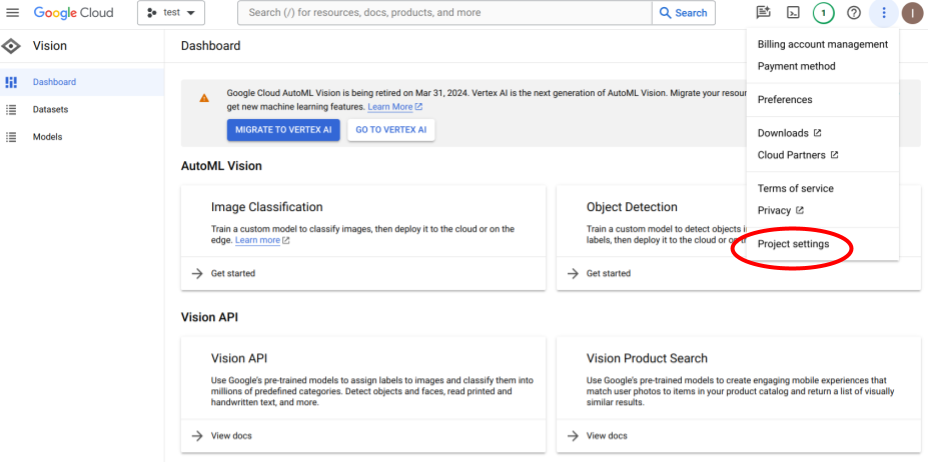
- Now you should be back on the dashboard. In the top right, click on the three vertical dots.
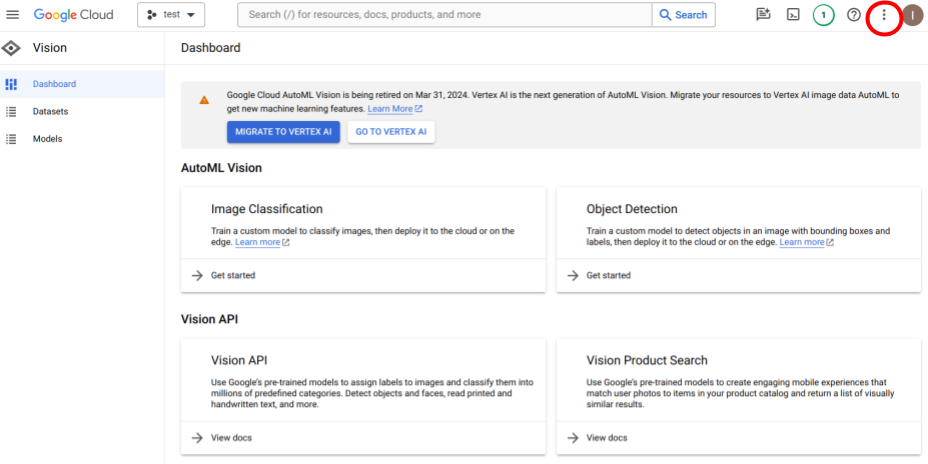
- In the drop-down menu, select "Project settings".
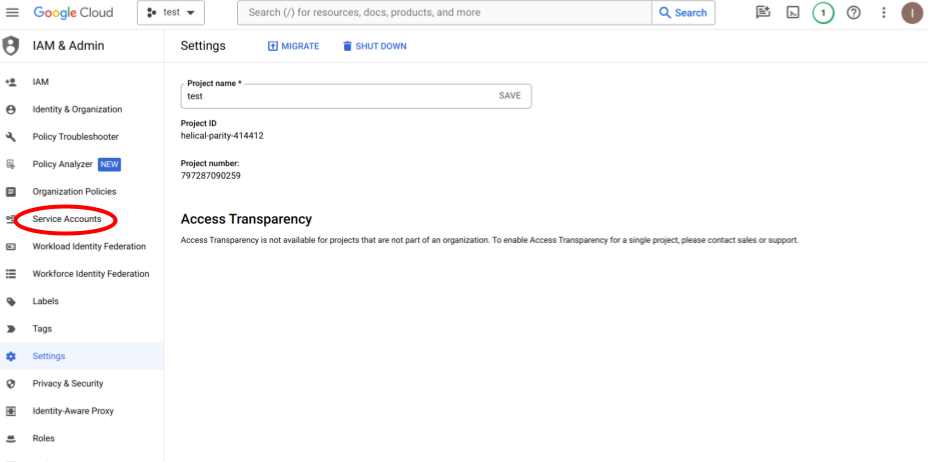
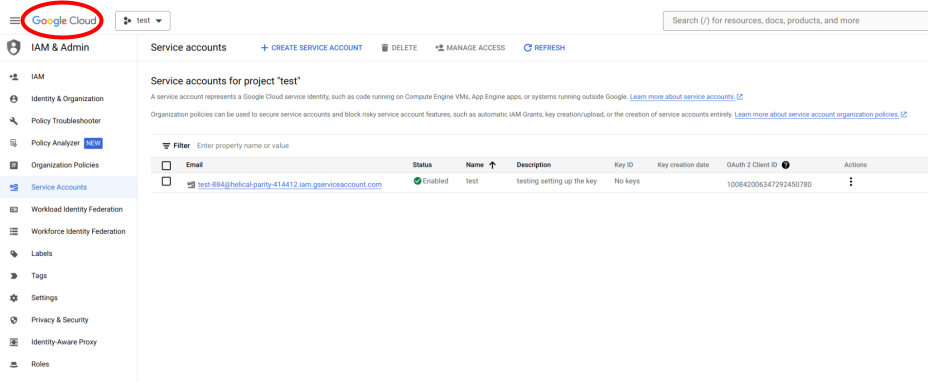
- In the menu on the left, click on "Service Accounts".
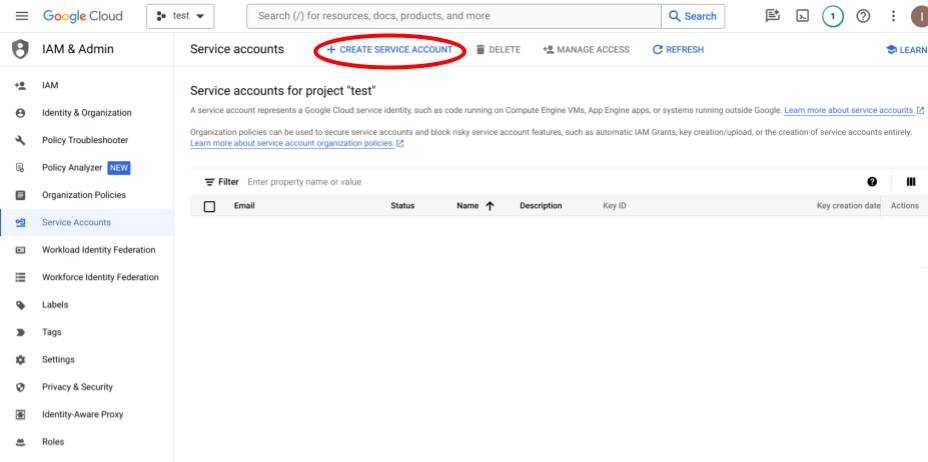
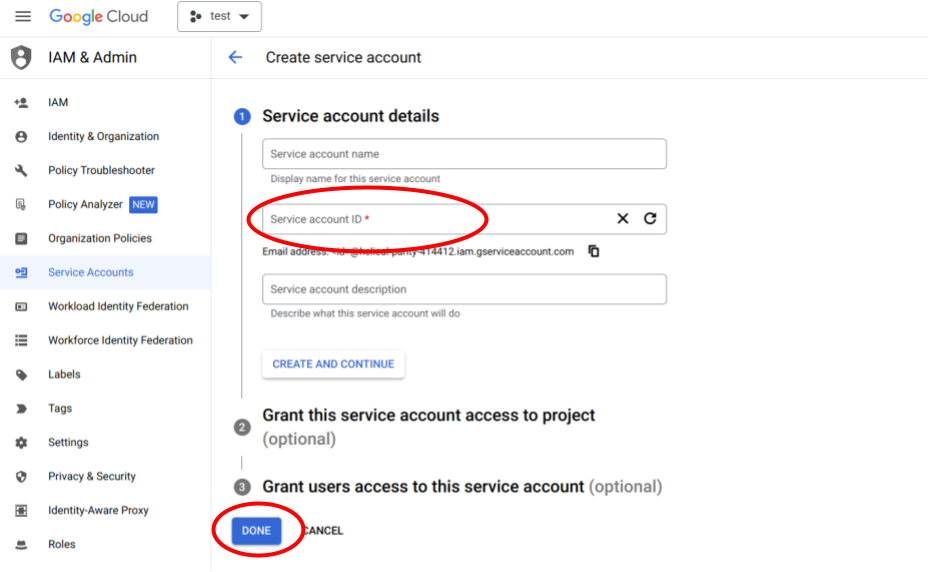
- Click on "+ CREATE SERVICE ACCOUNT".
- Select a service account ID (you can pick this as any name you wish). Click on "DONE".
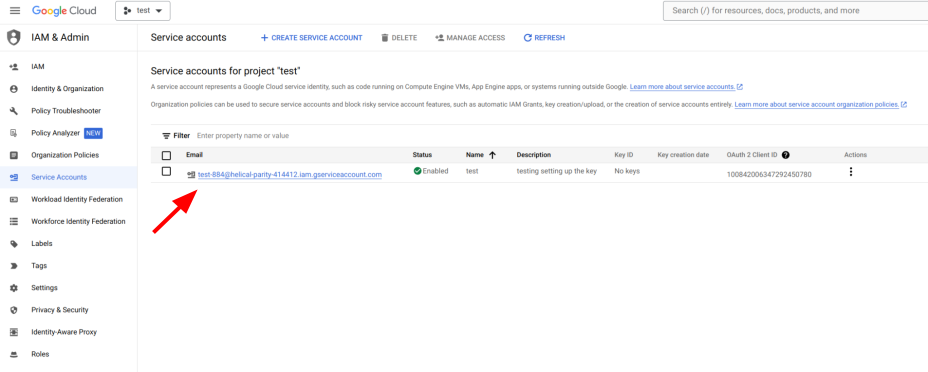
- Now your service account should show up in the list of service accounts.
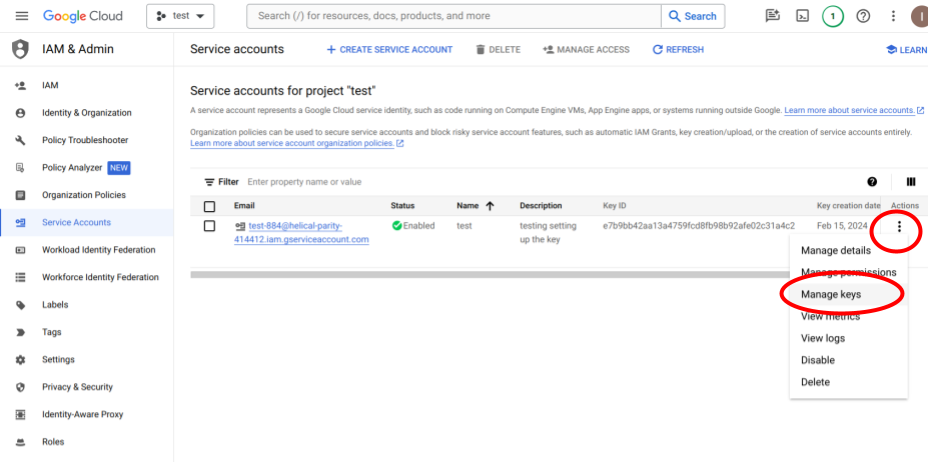
- Click on the three vertical dots to the right of your service account name and select "Manage keys".
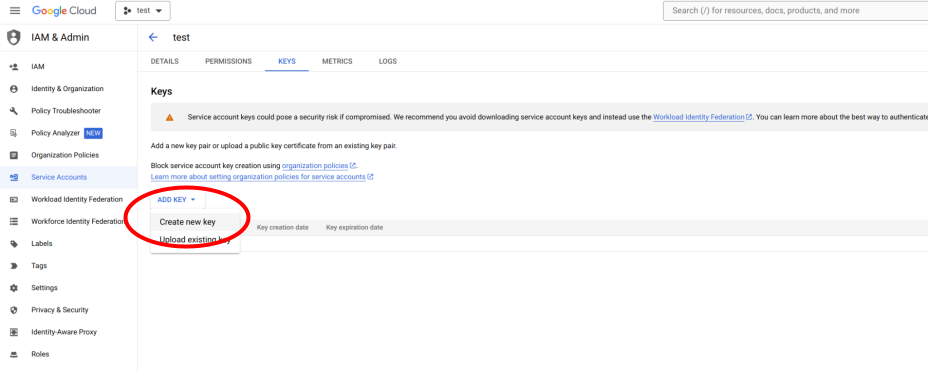
- Click on "Create new key".
- In the pop-up window, select "JSON" and click "CREATE".
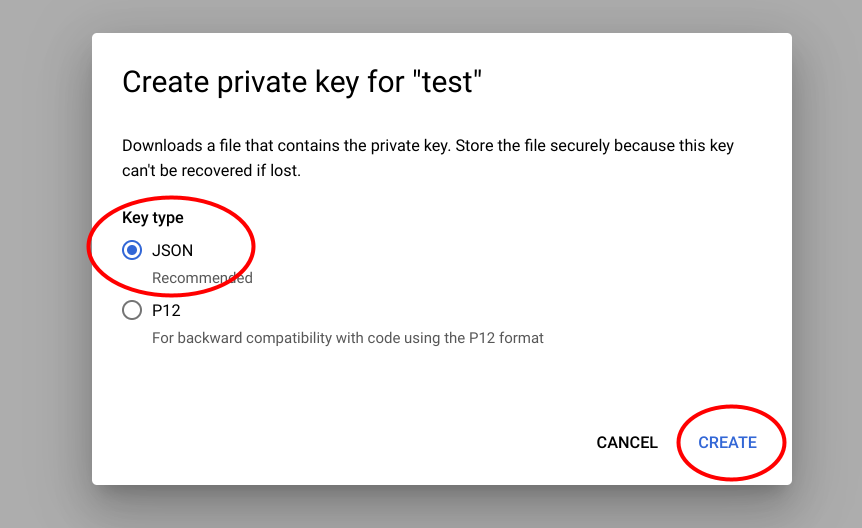
- The private key is directly downloaded to your computer. It should be in your downloads folder.
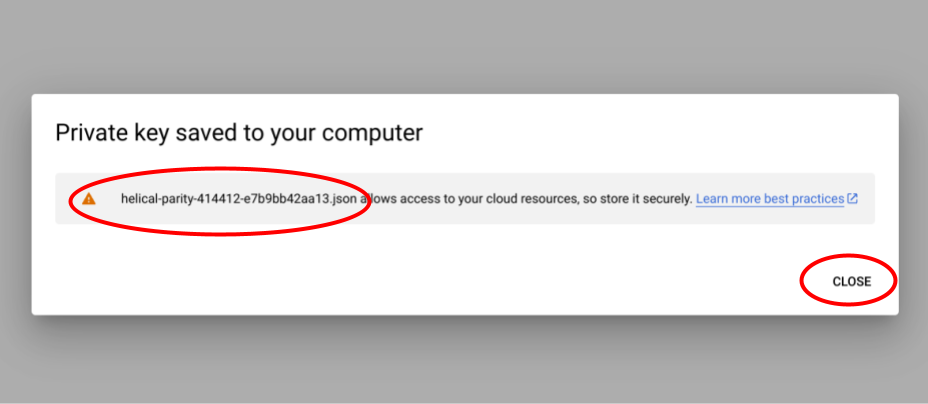
- The JSON key file will look something like this (any private information has been blanked out in the screenshot).

- Now go back to your browser window. Click on "Google Cloud" in the top left corner.
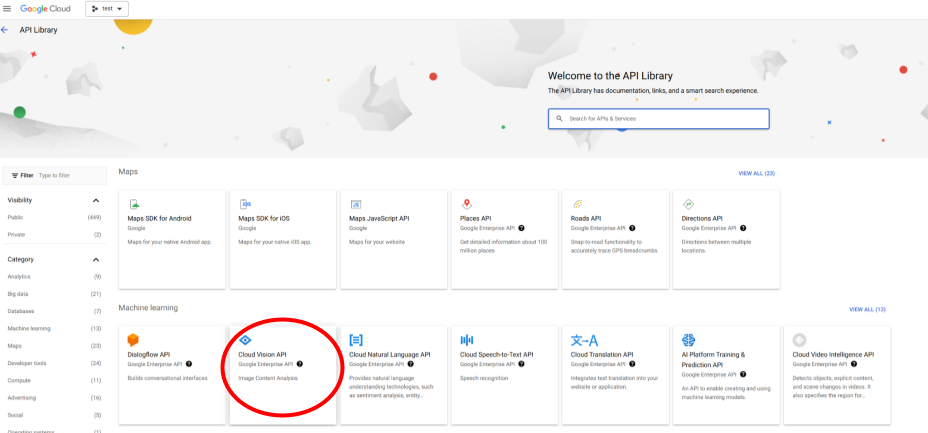
- Now select "APIs & Services".
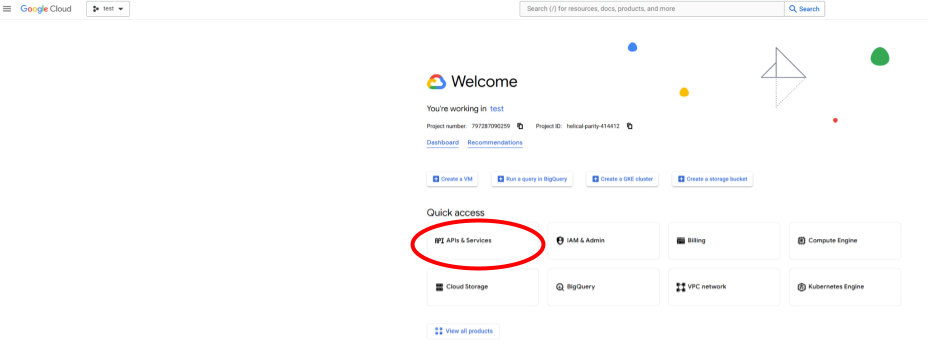
- From the selection of APIs, select "Cloud Vision API" or search for it and then select.
- Click on "ENABLE".
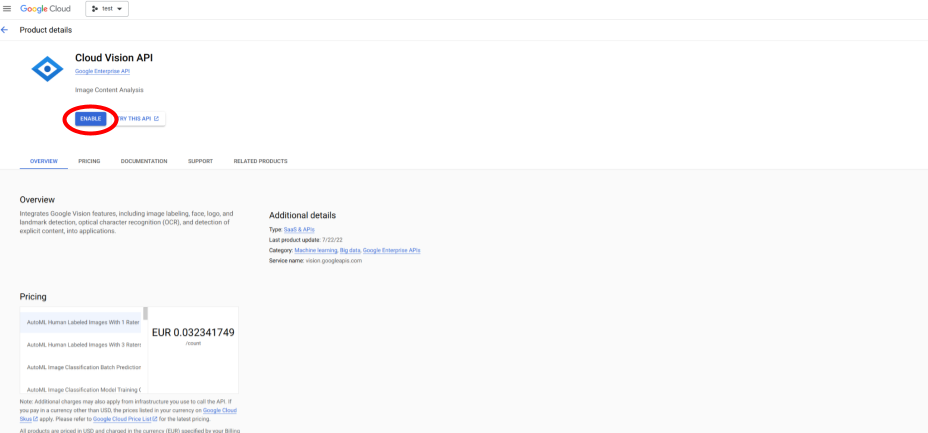
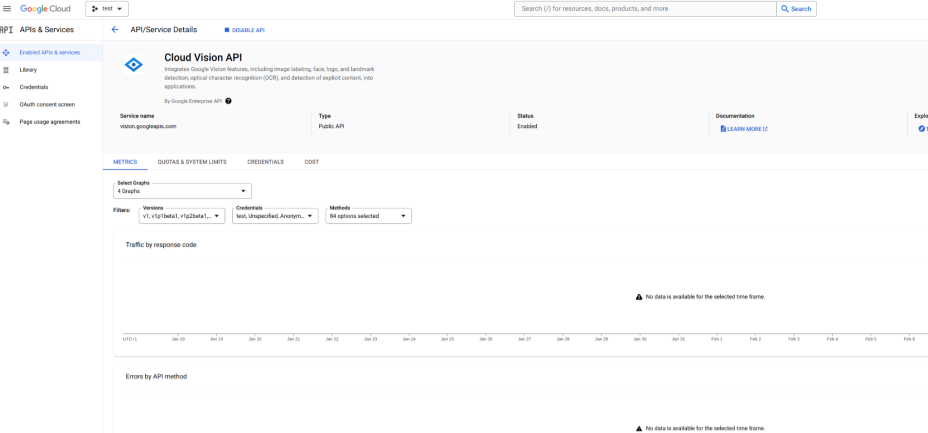
- Google Cloud Vision API is now enabled for your key.
- Place the JSON key in a selected folder on your computer and reference this key in your Jupyter Notebook / Python console when running ammico. Or, upload it to your google Drive to use it on google Colaboratory.